How to Avoid Scratches When Using a Car Cleaning Kit | Protect Your Paint and Keep That Showroom Shine
You wash your car carefully, step back to admire your work, and then the sun hits it just right. Swirl marks everywhere. Tiny scratches you never noticed before. It’s frustrating, right? You tried to do the right thing, but somehow your cleaning kit did more harm than good.
TL;DR: Most scratches come from your cleaning tools and technique, not from normal driving. Using the wrong towels, washing in circles, skipping the two-bucket method, and drying incorrectly all damage your paint. This guide shows you exactly how to use every item in your car cleaning kit without leaving a single scratch behind — from wash mitt to drying towel.
Key Takeaways
- Dirt is abrasive. Any tool that drags dirt across paint creates scratches
- Wash in straight lines, never circles — circular scratches show up more
- Two buckets with grit guards cut scratch risk by over 80%
- Never use dish soap, sponges, or cheap towels on your paint
- Drying causes more scratches than washing when done wrong
- Lubrication is everything — dry wiping is dangerous
- Touchless cleaning (foam cannons, blowers) is safest for black and dark paints
Understanding How Scratches Happen
Here’s the thing about car paint. It’s not as hard as you think. The clear coat on modern cars is typically only 35–50 microns thick — about the same as a sheet of printer paper. Once that clear coat is scratched, you can’t fix it without buffing or polishing.
Most people think scratches come from rocks, branches, or parking lot mishaps. But the truth? You cause most of the scratches yourself every time you wash the car. Your car cleaning kit — used the wrong way — becomes a tool for damage.
Dirt particles act like sandpaper. When you drag a wash mitt or towel across dry or poorly lubricated paint, those particles grind into the clear coat. One bad wash can add dozens of fine scratches that turn into swirl marks over time.
Ever wonder why older cars look dull and faded even though they’ve been “washed regularly”? That’s thousands of micro-scratches scattering light instead of reflecting it.
The Science of Swirl Marks
Swirl marks are just very fine scratches arranged in circular patterns. They happen when you wash or dry in circles. The human eye sees circular patterns more easily than straight lines, so those scratches become super obvious in sunlight.
That’s why professional detailers always wash and dry in straight lines — front to back on horizontal surfaces, top to bottom on vertical surfaces. When straight-line scratches happen (and they will), they’re much harder to see.
Here’s a question: Have you ever noticed that rental cars always seem to have terrible swirl marks? That’s dozens of people washing them wrong, one after another.
Timeline: How Car Scratch Prevention Has Evolved
| Period | Common Practice | Scratch Risk |
|---|---|---|
| 1900s | Cotton rags and brushes | Extreme — no understanding of clear coat |
| 1950s | Sponges and harsh detergents | High — sponges trap grit against paint |
| 1980s | Chamois leather and paste wax | Medium — chamois drags on dry paint |
| 2000s | First microfiber, still one bucket | Medium-low — better towels, but dirty water reused |
| 2010s | Two-bucket method with grit guards | Low — game changer for scratch prevention |
| 2020–2025 | Foam cannons, blowers, ceramic coatings | Very low — touchless methods eliminate contact scratches |
The Scratch-Free Car Cleaning Kit: What You Need
Let me walk you through exactly what belongs in a scratch-prevention kit. Prices are real from Amazon, Walmart, Home Depot, and Target as of April 2026.
| Product Type | Why It Prevents Scratches | Price Range |
|---|---|---|
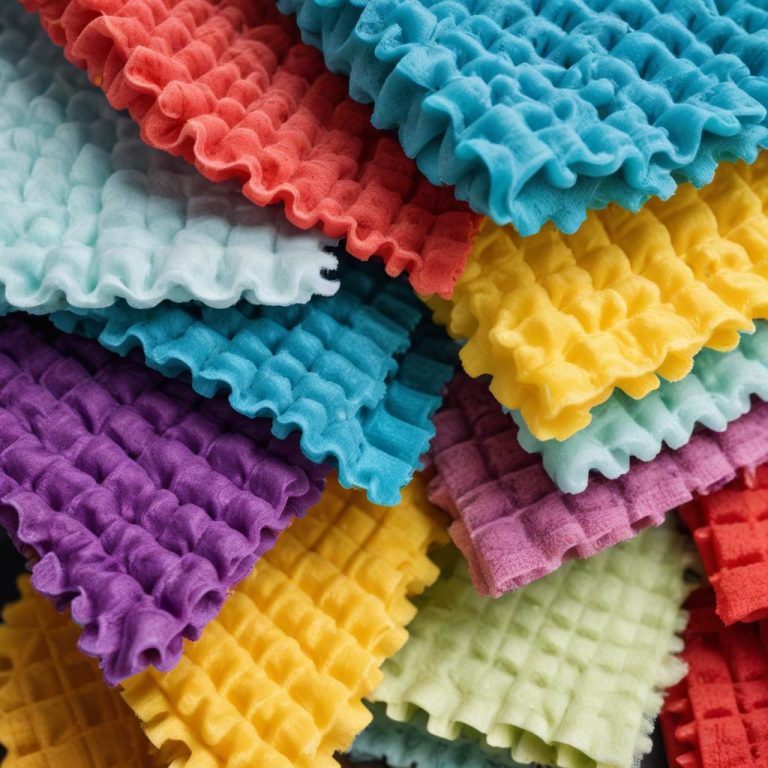
| High-GSM microfiber towels (350–500+ GSM) | Thick pile lifts dirt away from paint instead of grinding it | $15–25 for 6 |
| Microfiber wash mitt (woolly style) | Deep fibers trap dirt inside, not against paint | $10–15 |
| Two buckets with grit guards | Keeps dirty water separate from clean soap | $25–40 |
| pH-balanced car soap | Provides lubrication so dirt slides instead of scratches | $10–15 |
| Foam cannon (optional but recommended) | Removes 70–80% of dirt before you touch the paint | $25–50 |
| Grit guards (two) | Trap dirt at bucket bottom so you don’t recirculate it | $8–12 each |
| Electric blower or car dryer | Dries paint without any towel contact | $50–150 |
| Spray wax or quick detailer | Adds lubrication during drying so towels glide safely | $10–20 |
Prices checked April 2026. Foam cannon available at Lowe’s and Home Depot. Blowers at Walmart or Best Buy.
The Most Important Tool: Your Brain
Here’s something they don’t sell in stores. The single best scratch prevention tool is patience. Rushing causes almost every scratch. You wash too fast. You skip the pre-rinse. You dry with too much pressure. You use one towel for the whole car.
Slow down. Take your time. Your paint will thank you.
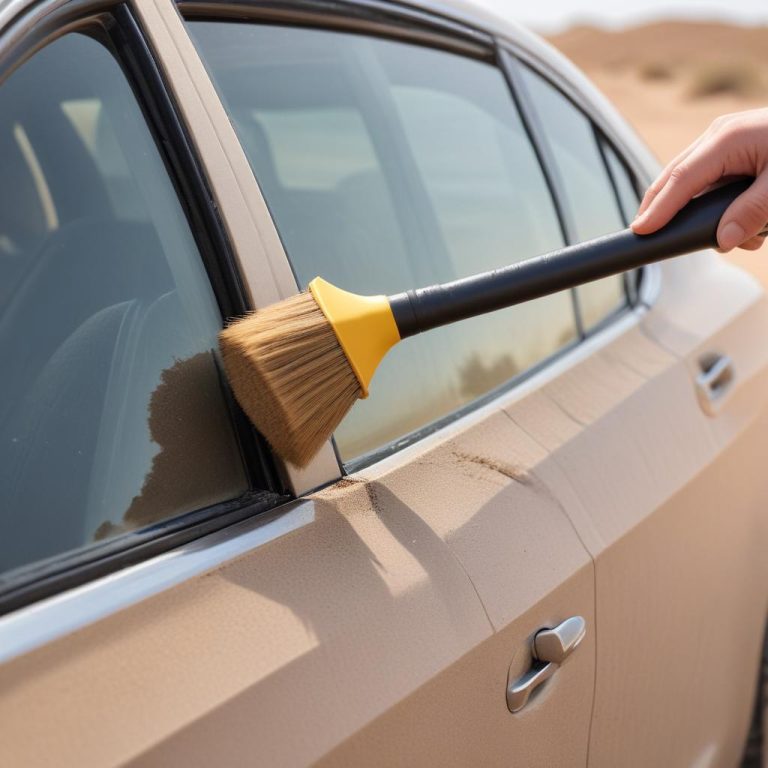
Safety reminder: If you drop any towel or mitt on the ground, do not use it on your paint. Even if it looks clean. Ground grit embeds in fibers and will scratch.
Step-by-Step: Scratch-Free Washing
Let me walk you through the exact process that keeps your paint safe. Follow these steps in order.
Step 1: Pre-Rinse Like Your Paint Depends On It
Before anything touches your car, spray it down thoroughly with a hose or pressure washer. Start at the roof and work down. Get into wheel wells, behind mirrors, and around emblems.
The goal is to remove as much loose dirt as possible. Heavy mud, road grime, and dust should be gone before any contact happens.
Cleaning tip: Let the water do the work. Hold the nozzle 6–12 inches from the surface. Closer isn’t better — it just wastes water.
Step 2: Foam Cannon Pre-Wash (If You Have One)
If you own a foam cannon, now’s the time. Cover the entire car in thick foam. Let it dwell for 3–5 minutes. The foam lifts dirt off the paint and encapsulates it. Then rinse thoroughly.
This step removes most of the remaining dirt without any physical contact. For black and dark paints, this is essential.
Here’s a question: Why scrub dirt off when you can let soap lift it away without touching?
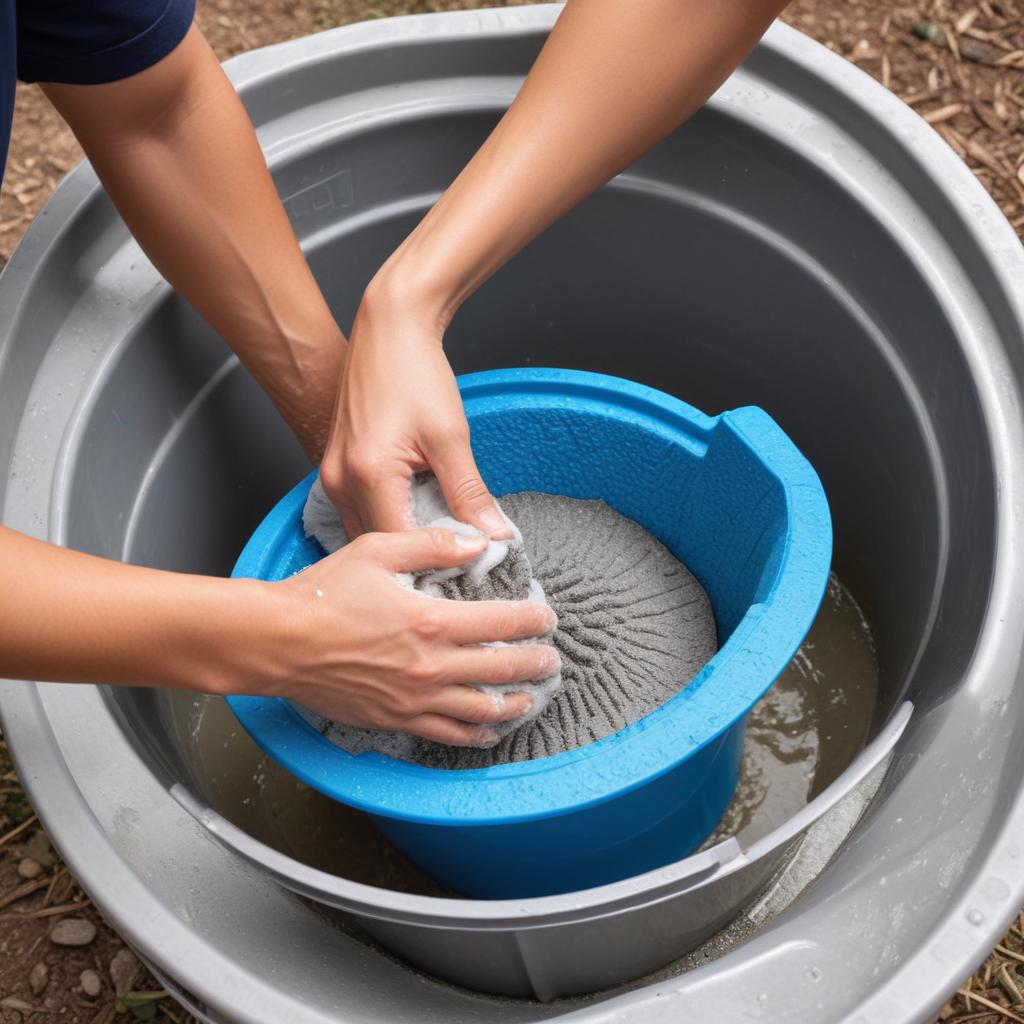
Step 3: Set Up Your Two-Bucket System
Fill one bucket with soap and water according to the label. Fill the second bucket with plain water. Drop a grit guard into the bottom of each bucket.
The grit guard has a grid pattern that traps dirt below the grid. When you dip your mitt, you’re pulling water from above the grid, not from the dirty bottom.
Step 4: Wash in Straight Lines
Dip your microfiber wash mitt into the soap bucket. Wash one panel at a time using straight lines. On the hood and roof, go front to back. On doors and fenders, go top to bottom. Never circles.
After each panel, rinse the mitt thoroughly in the rinse bucket. Squeeze out the dirty water. Then dip back into the soap bucket for the next panel.
Start from the roof and work down. Save the lower panels and bumpers for last — they’re the dirtiest.
Step 5: Rinse Thoroughly
After washing the entire car, rinse everything off. Start at the roof and work down. Make sure no soap residue remains anywhere — especially in gaps around lights, emblems, and trim.
Soap residue left to dry can leave spots that need to be rubbed off. And rubbing means more scratch risk.
Step 6: Dry Without Touching (Gold Standard)
This is where most people mess up. Drying with a towel — even a soft one — drags any remaining grit across the paint.
The safest method? Don’t touch at all. Use an electric leaf blower or a dedicated car dryer. Blow water off the paint, out of mirrors, from door handles, and out of trim gaps. What’s left will be tiny droplets that air dry without leaving spots if your water isn’t too hard.
If you must use a towel, use a high-GSM microfiber drying towel. Spray quick detailer or spray wax on the wet panel first for extra lubrication. Then pat dry or drag the towel gently in straight lines. Never rub.
Did you know that a leaf blower costs less than a professional paint correction? One swirl removal session runs $300–600. A $50 blower prevents the need entirely.
Common Scratch Mistakes (And How to Fix Them)
Let me list the specific mistakes that ruin paint. Avoid these and you’re 90% of the way to scratch-free cleaning.
Using Dish Soap
Dish soap strips wax, leaving your paint unprotected. Unprotected paint scratches more easily. Plus dish soap has degreasers that dry out rubber and plastic. Use pH-Balanced Cleaners made for cars.
Washing in Direct Sunlight
Heat makes water and soap dry instantly. Dried soap needs to be scrubbed off. Scrubbing scratches. Wash in shade or during cool morning/evening hours.
Reusing Dirty Towels
A towel that’s been used once is already full of tiny dirt particles. Don’t flip it and use the other side. Don’t shake it out and keep going. Grab a fresh towel. Have plenty on hand.
Pressing Too Hard
You don’t need muscle to clean a car. Let the soap and mitt do the work. Pressing hard pushes dirt into the clear coat. Light pressure, gentle passes.
Skipping Lubrication
Never wipe a dry surface. Never use a dry towel. Always use soap, quick detailer, or spray wax to provide lubrication. Dry wiping is like sanding your paint.
Here’s a question: Would you wipe a dusty table with a dry paper towel? No — you’d spray cleaner first. Same rule applies to your car.
Comparison: Scratch-Prone vs Scratch-Free Methods
Let me put this side by side so you can see the difference in risk.
| Action | Scratch-Prone Method | Scratch-Free Method |
|---|---|---|
| Pre-wash | Start scrubbing immediately | Hose rinse + foam cannon dwell |
| Buckets | One bucket, no grit guard | Two buckets with grit guards |
| Wash motion | Circular scrubbing | Straight lines, light pressure |
| Wash tool | Sponge or old rag | Microfiber wool mitt |
| Drying | One towel, rubbing motion | Blower or pat-dry with lubricant |
| Towels | Cheap, low-GSM, reused often | High-GSM, fresh towel per panel |
| Wax | Once a year if ever | Spray wax every wash for lubrication |
The scratch-free method takes about 15 minutes longer but keeps your paint looking new for years.
“Ninety percent of the swirl marks I see come from improper washing and drying, not from driving. People spend hundreds on paint correction then go back to the same bad habits.” — Jason Rose, Rupes Paint Polishing Specialist
How to Maintain Your Tools for Scratch Prevention
Your tools are only as good as their condition. Dirty, worn-out tools scratch paint just as badly as bad technique.
Microfiber Towel Care
Wash microfiber towels separately from all other laundry. Use liquid detergent only — powder doesn’t rinse out fully. Never use fabric softener or bleach. Both coat the fibers and ruin their ability to trap dirt.
Dry on low heat or hang dry. High heat melts the fibers. When towels feel rough or don’t absorb water anymore, retire them to wheel or engine bay duty.
Wash Mitt Care
After each use, rinse the mitt thoroughly until water runs clear. Squeeze out excess water. Hang to dry completely before storing. Never leave a wet mitt balled up — mildew and bacteria grow fast.
Replace your mitt every 6–12 months or when the fibers feel matted down.
Bucket and Grit Guard Care
Rinse buckets after each use. Let them dry before stacking. Grit guards can be sprayed with a hose and scrubbed occasionally if they get buildup.
Safety reminder: Never use the same bucket for wheels that you use for paint. Brake dust contains metal particles. Those particles embed in the bucket and transfer later.
Special Considerations for Different Paint Colors
Black and Dark Paints
Black paint shows everything. You need the highest level of scratch prevention. Use a foam cannon. Use two buckets. Use a blower for drying. Use ceramic spray wax after every wash to fill minor imperfections.
White and Light Paints
White hides swirl marks well but still shows deeper scratches. You can be slightly less strict but still follow the basics. Two buckets still matter. Straight lines still matter. Drying still matters.
Matte Paints
Matte finishes are a whole different animal. Never use wax, polish, or spray detailers — they’ll make matte paint shiny and blotchy. Use only products labeled for matte finishes. And never, ever rub hard. Matte paint scratches show up as shiny spots.
Cleaning tip: If you have matte paint, skip the spray wax entirely. Use a matte-specific quick detailer for lubrication during drying.
FAQ: Avoiding Scratches With a Car Cleaning Kit
What causes the most scratches during car washing?
Dirty wash mitts and skipping the pre-rinse. Dirt dragged across dry paint creates micro-scratches every time.
Can I use a squeegee on my car windows?
No. Squeegees trap dirt between the blade and glass. Use microfiber and glass cleaner instead.
Are electric car washes safe for paint?
Touchless washes use harsh chemicals that strip wax. Brush washes scratch. Hand washing with proper technique is safest.
How do I know if my microfiber towels are scratching?
Run the towel over a CD or DVD. If it leaves scratches on the disc, it will scratch your paint. Quality towels won’t.
Is a clay bar safe for scratch prevention?
Clay bars remove bonded contaminants but can cause marring. Only use clay with plenty of lubricant, and follow with polish. Not for every wash.
What’s the safest way to remove bird droppings?
Soak a microfiber towel with quick detailer. Lay it over the dropping for 2–3 minutes to soften. Then gently wipe. Never scrape dry droppings.
How often should I wax to prevent scratches?
Every 2–4 weeks with spray wax. Wax provides a slick surface that lets dirt slide off instead of grinding in.
Final Thoughts: Your Technique Matters More Than Your Products
Look, you don’t need a $500 car cleaning kit to avoid scratches. You need decent tools and good habits. A $60 kit used correctly will scratch less than a $300 kit used carelessly.
Focus on the fundamentals. Pre-rinse. Two buckets. Straight lines. Light pressure. Lubrication. Touchless drying. Fresh towels. Those seven rules will protect your paint better than any expensive product.
The best part? Once you build these habits, they become automatic. You won’t even think about them. And every time the sun hits your car and you see nothing but perfect reflection, you’ll know it was worth the extra few minutes.
Your paint is only original once. Protect it like it matters.
What’s your biggest struggle with keeping scratches off your car? Share your experience in the comments below.
References: