How to Use a Car Cleaning Kit Step by Step | From Confusion to Perfect Finish in One Afternoon
You open that new car cleaning kit, stare at the bottles, mitt, and towels, and realize there’s no instruction manual — just a bunch of stuff you’re supposed to magically know how to use together.
That’s frustrating. Kits come with great products, but no one tells you the order, the technique, or the little tricks that make everything work. The result? You end up using half the products wrong, skipping others entirely, and feeling like you wasted your money. This guide fixes that. Follow these steps in order, and every product in your kit will earn its keep.
TL;DR
Using a car cleaning kit step by step: Start with wheels using the dedicated wheel cleaner and a separate brush. Then rinse the whole car. Mix car shampoo in one bucket and fill a second with plain water. Wash from the top down using the two-bucket method, rinsing your mitt after each panel. Rinse the car, then dry immediately with microfiber towels and spray wax as a drying aid. Clean windows with glass cleaner. Finish with tire dressing and interior cleaning using the kit’s interior products. Total time: 30–60 minutes.
Key Takeaways
- Read every label before you start — some products need to sit, others need dilution.
- Always clean wheels first using the wheel-specific product and a separate mitt or brush.
- Use the two-bucket method: one soapy bucket, one rinse bucket.
- Wash from the roof down to avoid dragging dirt onto clean areas.
- Dry immediately after rinsing; never let the car air dry.
- Interior products go on last, using separate towels from exterior work.
Understanding What’s Actually in Your Kit
Here’s the thing about car cleaning kits — no two are exactly alike. But most contain the same basic categories of products. Learn what each one does, and you can use any kit confidently.
Interesting fact: A typical $30–50 car cleaning kit contains about $60–80 worth of products if bought separately. Kits are almost always cheaper than buying individual items.
Let me walk you through the most common items you’ll find.
Exterior Cleaning Products
Car Shampoo — This is your main wash soap. It’s pH-balanced for car paint, unlike dish soap which strips wax. Most are concentrated — meaning you add a little to a bucket of water.
Wheel and Tire Cleaner — A stronger formula for brake dust and road grime. Usually sprayed on, left to sit for a few minutes, then rinsed or scrubbed. Never use this on your paint.
Glass Cleaner — For windows. Most are ammonia-free so they don’t damage window tint. Spray on a towel, not directly on glass, to avoid drips.
Spray Wax or Quick Detailer — Used as a drying aid (spray on wet paint before drying) or as a between-washes refresher. Adds shine and protection.
Tire Dressing — A spray or gel that makes tires look dark and shiny. Applied after the car is dry, usually last.
Interior Products
Interior Cleaner or All-Purpose Cleaner — For dashboards, door panels, and vinyl surfaces. Some kits include a dedicated fabric cleaner for seats.
Odor Eliminator — A spray that neutralizes smells rather than covering them up. Used at the very end.
Tools and Towels
Wash Mitt — Usually microfiber. This touches your paint. Keep it clean and never drop it on the ground.
Microfiber Towels — For drying, buffing wax, and cleaning glass. Different towels for different jobs.
Applicator Pad — A small foam pad for applying wax or tire dressing.
Wheel Brush — Sometimes included. If not, use an old towel or a separate mitt for wheels.
Safety reminder: Read every label before first use. Some products need to be diluted with water. Some should never touch certain surfaces (like wheel cleaner on paint).
Do you know what every product in your kit actually does? Take five minutes to read each label right now.
Timeline: How Car Cleaning Kits Have Evolved
Car cleaning kits weren’t always this helpful. Here’s how they’ve changed.
Modern kits include more specialized products and better tools. But the basic steps haven’t changed — only the quality has improved.
Step-by-Step: Using Your Entire Car Cleaning Kit
Follow these steps in order. Don’t skip around. Each step prepares the car for the next.
Step 1: Gather Everything and Read Labels
Before you touch the car, lay out everything from your kit. Check each bottle for two things: (1) Does it need to be diluted? (2) How long does it need to sit on the surface?
What to look for:
- Car shampoo: Usually 1–2 ounces per gallon of water.
- Wheel cleaner: Usually spray on, wait 2–3 minutes, then rinse.
- Interior cleaner: Usually ready-to-use, but some need dilution.
- Spray wax: Ready-to-use.
Also check: Do you have enough towels? A typical kit includes 2–3 towels. For a full wash, you’ll want 4–6. Supplement with your own clean microfiber towels if needed.
Interesting fact: Most people use way too much product. A little goes a long way. Using more doesn’t clean better — it just wastes money and leaves residue.
Step 2: Park in the Shade and Prep Your Space
Find a shady spot. Direct sunlight makes soap dry too fast and leaves water spots. Early morning or late evening works if you have no shade.
What to do:
- Park on a flat surface.
- Roll up windows completely.
- Remove loose items from the car (trash, floor mats, phone cables).
- Set up your buckets.
If your kit includes buckets: Great. If not, use any two buckets you have. One for soapy water, one for plain rinse water.
Step 3: Clean the Wheels First
Wheels are the dirtiest part of the car. Do them first so any splashing doesn’t ruin your freshly cleaned paint.
Using the wheel cleaner from your kit:
- Spray wheel cleaner onto all wheels and tires. Most kits include a dedicated wheel spray.
- Let it sit for the time listed on the bottle (usually 2–3 minutes). Don’t let it dry.
- Scrub with the wheel brush if your kit has one. If not, use an old rag or a separate mitt (not your good wash mitt).
- Rinse thoroughly with a hose.
Important: After cleaning wheels, rinse your wheel brush or mitt completely. Wash your hands if you touched the wheel cleaner. Do not let wheel cleaner touch your paint.
Safety reminder: Some wheel cleaners contain strong acids. Wear gloves if your skin is sensitive. Never leave wheel cleaner on too long — it can damage the wheel finish.
Step 4: Pre-Rinse the Whole Car
Use your hose to wet the entire car. Start at the roof and work down. This removes loose dirt and dust before you ever touch the paint with a mitt.
Spend extra time on:
- Front bumper and grille (bugs stick here)
- Lower door panels (road spray)
- Wheel wells (trapped sand and mud)
Tip: Use a gentle shower setting on your hose nozzle, not a sharp jet. High pressure can force water into seals and electrical components.
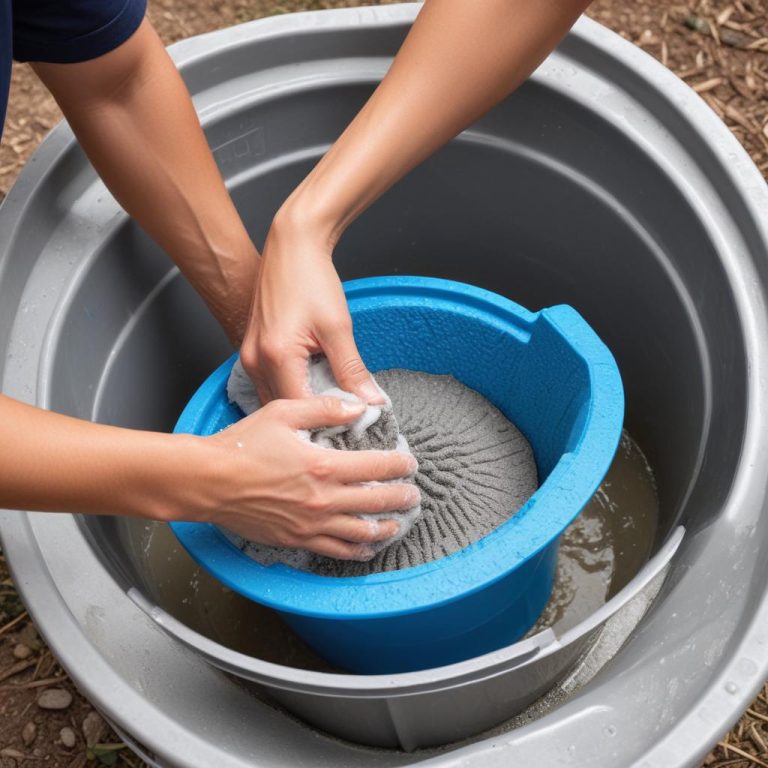
Step 5: Set Up the Two-Bucket Method
This is the most important technique your kit doesn’t come with instructions for.
Fill your buckets:
- Bucket 1 (Soap): Add water. Add car shampoo according to the label. Usually 1–2 ounces per gallon. Swish to mix.
- Bucket 2 (Rinse): Fill with plain water. No soap.
How to use them:
- Dip your wash mitt into the soapy bucket.
- Wash one panel of the car (like the roof or a door).
- Dip the dirty mitt into the rinse bucket. Swish to release dirt.
- Squeeze out the rinse water.
- Dip mitt back into the soapy bucket.
- Move to the next panel.
Why this works: The rinse bucket keeps dirt from building up in your soapy water. Without it, you’re just rubbing dirty water all over your car.
Do you usually use just one bucket? That’s the number one cause of swirl marks.
Step 6: Wash from Top to Bottom
Now you’re ready to wash. Work in sections. Don’t try to soap the whole car at once — it will dry before you rinse.
Order of panels:
- Roof
- Windows
- Hood
- Upper doors and upper quarter panels
- Trunk or tailgate
- Lower doors and rocker panels
- Front and rear bumpers
- Lower panels near wheels (save for last)
Washing technique:
- Use light pressure. Let the mitt glide.
- Use straight-line motions, not circles. Circles create visible swirl marks.
- Rinse your mitt in the rinse bucket after every single panel.
- If you drop your mitt on the ground, stop. Get a clean mitt or use a different tool.
Interesting fact: A typical car has about 200 square feet of exterior surface. That’s about the size of a small bedroom floor. No wonder it takes a while.
Step 7: Final Rinse
Once the whole car is washed, do a final rinse with your hose. Start at the roof again and work down.
Pro technique: Remove the nozzle from your hose. Let a gentle, wide stream of water flow over the panels. This “sheeting” action leaves less water behind, which means less drying time.
Step 8: Dry Immediately with Spray Wax
This is where most people mess up. They walk away to put away supplies, and the water evaporates, leaving hard water spots.
Using the spray wax or quick detailer from your kit:
- Grab your largest microfiber drying towel.
- Spray a light mist of spray wax onto the wet panel.
- Lay the towel flat on the paint and pull it toward you. No scrubbing.
- Flip the towel to a dry section after each pull.
- Wring out the towel when it gets saturated.
Drying order: Same as washing — top to bottom.
Why spray wax as a drying aid: It lubricates the towel so it glides instead of drags. It also adds a layer of protection and makes water bead up next time.
Safety reminder: If your kit includes a squeegee, don’t use it on paint. Squeegees trap grit and create deep scratches. Use it only on glass if at all.
Step 9: Clean the Windows
After the car is dry, clean the windows with the glass cleaner from your kit.
How to use glass cleaner:
- Spray the glass cleaner onto a clean microfiber towel — not directly onto the glass.
- Wipe the window in one direction (horizontal on front windows, vertical on rear).
- Use a second dry microfiber to buff any streaks.
- If you see streaks, you used too much product. Less is more.
Pro tip: Clean the inside of windows with a different towel than the outside. The inside has a greasy film from dashboard plastics. The outside has road grime. Don’t mix them.
Step 10: Apply Tire Dressing (If Your Kit Has It)
Tire dressing is usually the last exterior step. It makes tires look dark and shiny.
How to apply:
- Make sure tires are completely dry.
- Spray or wipe the dressing onto the sidewall of the tire. Avoid getting it on the tread (the part that touches the road).
- Spread evenly with the applicator pad if included.
- Let it dry for 10–15 minutes before driving.
Safety reminder: Tire dressing can be slippery. Never put it on the tread of the tire — only the sidewall. And don’t drive immediately after applying.
Step 11: Interior Cleaning
Now move inside. Use the interior products from your kit. If your kit has separate interior cleaner and glass cleaner, use them in this order.
Vacuum first:
- Remove floor mats and vacuum them separately.
- Vacuum seats, carpets, and cargo area.
- Use the crevice tool for between seats and under pedals.
Clean hard surfaces:
- Spray interior cleaner onto a microfiber towel (not directly on surfaces).
- Wipe dashboard, door panels, center console, and steering wheel.
- Use a detailing brush or a toothbrush for vents and buttons.
- Buff with a dry section of the towel.
Clean interior glass:
- Same technique as exterior glass, but use a different towel.
- Roll down the window slightly to clean the very top edge.
Apply odor eliminator (if included):
- Spray into the footwells and under seats.
- Don’t spray directly onto fabrics or leather — spray into the air.
- Leave windows open for 5–10 minutes to air out.
Interesting fact: Most interior cleaners also offer UV protection. Check the label. If yours does, you’re helping prevent dashboard cracking and fading.
Step 12: Final Touches and Cleanup
You’re almost done. Do these last few things:
- Open all doors and wipe down the door jambs (the painted area you see when doors are open). Use a damp towel, not interior cleaner.
- Check for any missed spots — lower door panels often get missed.
- Put everything back in your kit. Rinse out the wash mitt and hang it to dry. Wipe out the buckets.
- Step back and admire your work.
Do you usually skip the door jambs? Most people do. But clean jambs make the whole car feel fresher.
What If Your Kit Is Missing Something?
Not every kit includes every product mentioned here. Here’s how to work with what you have.
| Missing Item | What to Do Instead |
|---|---|
| Wheel cleaner | Use car shampoo on wheels. It’s weaker but works for light dirt. |
| Spray wax | Dry without a drying aid, but use very light pressure. |
| Tire dressing | Skip it. Clean tires still look fine without shine. |
| Interior cleaner | Mix a drop of car shampoo with water in a spray bottle. |
| Glass cleaner | Use diluted white vinegar (1:1 with water) in a pinch. |
| Second bucket | Use a large mixing bowl or a small trash can. |
| Microfiber towels | Use clean, soft cotton towels temporarily. Buy microfiber asap. |
Tip: If your kit came with a foam sponge instead of a microfiber mitt, consider buying a mitt separately. Sponges trap grit against the paint. They cost $8–12 and are worth it.
Comparison Table: What Different Kits Include
Real data from popular kits at Amazon, Walmart, and Target as of April 2025.
| Kit | Exterior Products | Interior Products | Towels | Buckets | Price |
|---|---|---|---|---|---|
| Meguiar’s Complete Kit | Wash, wax, wheel cleaner | Interior cleaner | 2 towels | No | $30–40 |
| Chemical Guys Medium Kit | Wash, wax, wheel cleaner, tire shine | None | 3 towels, 1 mitt | 2 buckets | $50–70 |
| Armor All Extreme Kit | Wash, wax, tire shine | Interior cleaner, glass cleaner | 1 towel | No | $25–35 |
| Adam’s Polishes Basic Kit | Wash, detailer, wheel cleaner | Interior cleaner | 4 towels | No | $70–90 |
| Turtle Wax Hybrid Kit | Wash, ceramic spray, wheel cleaner | Glass cleaner | 2 towels | No | $35–50 |
Common Mistakes When Using a Kit
Mistake #1: Using Dish Soap Instead of Car Shampoo
Your kit came with car shampoo for a reason. Dish soap strips wax and can dry out rubber seals.
Fix: Use the car shampoo from your kit. If you run out, buy more car shampoo — not dish soap.
Mistake #2: Mixing Towels Between Jobs
That one towel touched your wheels, then your paint, then your windows. Now everything has brake dust on it.
Fix: Keep towels separate. Use different colors or mark them with a permanent marker. Paint towels. Glass towels. Interior towels. Wheel towels.
Mistake #3: Letting Products Dry on the Surface
Wheel cleaner, soap, and spray wax all say “do not let dry” for a reason. Dried product is hard to remove and can stain.
Fix: Work one panel at a time. Rinse or wipe before moving to the next section.
Mistake #4: Using Too Much Product
You think more soap means cleaner. It doesn’t. Too much soap leaves residue that’s hard to rinse off.
Fix: Measure if you’re unsure. Most concentrated shampoos need only 1 ounce per 2–3 gallons of water. That’s about two soda bottle caps.
Mistake #5: Skipping the Rinse Bucket
You’re busy. You just want to get it done. One bucket seems faster. But that one bucket becomes a muddy soup of grit.
Fix: Take the extra minute to fill two buckets. Your paint will thank you.
Have you made any of these mistakes? Most people have. Now you know how to fix them.
FAQ: Using Your Car Cleaning Kit
What order should I use the products in my kit?
Wheels first, then wash, then dry with spray wax, then windows, then interior, then tire dressing last.
Do I need to use every product in the kit every time?
No. Use wheel cleaner, car shampoo, and drying spray wax every wash. Use tire dressing and interior products as needed.
How much car shampoo should I use?
Read the label. Most concentrated shampoos use 1–2 ounces per gallon of water. A typical bucket holds 2–3 gallons.
Can I use the wheel cleaner on my paint?
Never. Wheel cleaner is too strong for paint. Use it only on wheels and tires.
How do I clean the wash mitt after using the kit?
Rinse it thoroughly with clean water. Squeeze out excess water. Hang to dry. Never put it away wet.
What if my kit doesn’t have a second bucket?
Use any bucket, large bowl, or even a clean trash can for your rinse bucket. Or change the soapy water halfway through.
How often should I replace the towels in my kit?
Replace microfiber towels when they feel rough or stop absorbing water. Every 20–30 washes for drying towels. Wash mitts every 20–30 washes.
The One-Page Cheat Sheet
Print this and keep it with your kit.
Before You Start (5 min)
- [ ] Park in shade
- [ ] Read all labels
- [ ] Fill two buckets (soap + rinse)
Wheels (5 min)
- [ ] Spray wheel cleaner
- [ ] Let sit 2–3 min
- [ ] Scrub, rinse
Wash (15 min)
- [ ] Rinse car
- [ ] Wash top to bottom
- [ ] Rinse mitt after each panel
- [ ] Final rinse
Dry (5 min)
- [ ] Spray wax on wet panel
- [ ] Dry with microfiber towel
- [ ] Top to bottom
Finish (10 min)
- [ ] Clean windows
- [ ] Apply tire dressing
- [ ] Vacuum interior
- [ ] Wipe interior surfaces
Cleanup (5 min)
- [ ] Rinse mitt and hang dry
- [ ] Wipe out buckets
- [ ] Close all product caps
- [ ] Store kit in dry place
Interesting fact: The first time you follow this complete step-by-step process, it might take 90 minutes. The fifth time, you’ll do it in 45. Speed comes with practice.
What’s your go-to cleaning method or tool? Share your experience in the comments below.
References: