How to Detail Your Car at Home Using a Kit | Transform Your Daily Driver into a Showroom Stunner
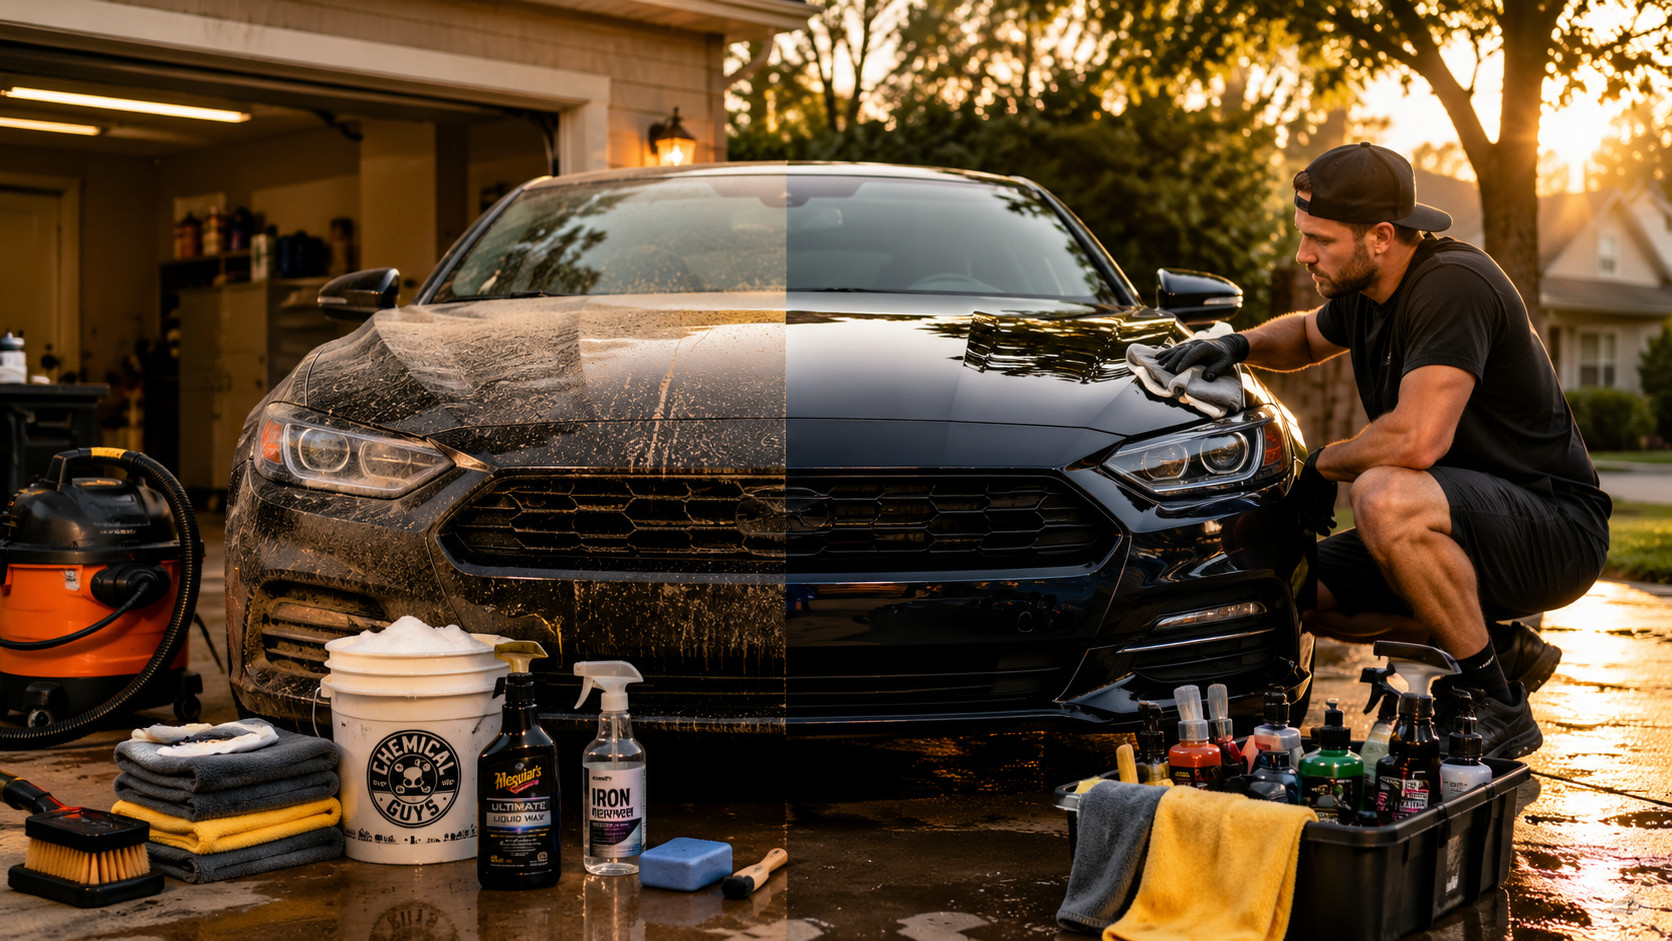
You’ve seen those satisfying detail videos online — the ones where a filthy car becomes spotless, every surface shines, and even the cup holders look brand new — and you think, “I’d love to do that, but I don’t have a garage full of expensive tools.”
Good news. You don’t need professional equipment or a dedicated shop. A basic car cleaning kit — the same one you use for regular washes — can handle most of the work. Detailing at home is just washing plus a few extra steps. You’re going deeper, cleaning the places you usually ignore, and adding protection that lasts. This guide walks you through the whole process, from the roof down to the floor mats, using nothing fancy.
TL;DR
Detailing your car at home with a standard cleaning kit means adding three steps to your regular wash: decontamination (clay bar or mitt), polishing (light compound or glaze), and protection (wax or sealant). Inside, you’ll vacuum thoroughly, clean all surfaces with appropriate products, and finish with glass and fabric protection. A basic kit with microfiber towels, interior cleaner, glass cleaner, and a spray wax is enough to start. Set aside 2–3 hours for a full detail.
Key Takeaways
- Detailing is washing plus deeper cleaning and protection — not magic.
- Use a clay bar or clay mitt to remove bonded contamination that washing leaves behind.
- Apply a light polish or glaze to restore shine and remove fine swirl marks.
- Protect your work with wax, sealant, or ceramic spray.
- Inside, vacuum first, then clean surfaces, then protect.
Understanding Home Detailing vs. Regular Washing
Here’s the thing about detailing — people think it’s a mysterious art that requires years of training. It’s not. Detailing is just washing with extra attention. A regular wash cleans the surface. Detailing cleans the surface, removes embedded dirt, restores shine, and adds protection.
Interesting fact: After a regular wash, your paint might look clean, but run your fingers across it. Feel those little bumps? That’s bonded contamination — brake dust, industrial fallout, tree sap — that washing alone can’t remove. Detailing removes that.
Think about it. You wash your face every day. But once in a while, you use a scrub to remove dead skin and unclog pores. That’s what detailing does for your car. It’s a deep clean that resets everything.
So ask yourself: When was the last time you did more than just wash and dry? If it’s been months or years, your car is ready for a detail.
What’s the Difference Between a Wash and a Detail?
| Step | Regular Wash | Full Detail |
|---|---|---|
| Rinse and foam | Yes | Yes |
| Two-bucket wash | Yes | Yes |
| Wheels cleaned | Yes | Yes, plus wheel wells |
| Drying | Yes | Yes |
| Clay bar treatment | No | Yes |
| Polish or glaze | No | Yes (if needed) |
| Wax or sealant | Maybe (spray wax) | Yes (paste or liquid) |
| Interior vacuum | Quick | Thorough, including crevices |
| Interior surface clean | Wipe-down | Full scrub with brushes |
| Glass clean | Yes | Yes, inside and out |
| Fabric or leather treatment | No | Yes |
A regular wash takes 30 minutes. A full detail takes 2–3 hours. But you don’t need to detail every time. Most daily drivers benefit from a full detail every 3–6 months.
Safety reminder: Detailing products are safe when used as directed. But always test a new product on a small, hidden area first — inside the door jamb or under the hood.
Do you know whether your car needs a wash or a detail right now? Run your finger across the hood after washing. If it feels bumpy, you need a detail.
Timeline: How Car Detailing Has Evolved at Home
Home detailing used to be something only serious enthusiasts did. Now it’s accessible to everyone.
Better products and simpler tools have made professional-quality detailing possible for anyone with a driveway and a basic cleaning kit.
What Your Cleaning Kit Needs for Detailing
Your regular car cleaning kit probably has most of what you need. You might need to add just a few items.
What Your Kit Likely Already Has
- Car shampoo — for the initial wash
- Wash mitt — microfiber, plush
- Microfiber towels — at least 4–6 clean ones
- Wheel cleaner — for tires and wheels
- Glass cleaner — for windows inside and out
- Spray wax or quick detailer — for maintenance shine
What You Might Need to Add
- Clay bar or clay mitt — $15–25, removes bonded contamination
- Clay lubricant — often included with clay bars, or use quick detailer
- Light polish or glaze — $10–15, restores shine and removes light swirls
- Foam applicator pads — $5–8, for applying wax or polish
- Interior brush set — $5–10, for vents and crevices
- Fabric cleaner — $10–15, for seats and carpets
- Leather cleaner and conditioner — $15–20, if you have leather seats
Total added cost: $40–80 to upgrade your basic kit for full detailing.
Interesting fact: A clay bar treatment removes contamination that makes your paint feel rough. After claying, your paint will feel as smooth as glass — even if it’s a 10-year-old car.
Do you already own a clay bar? If not, that’s the single best upgrade you can make for exterior detailing.
Part 1: Exterior Detailing Step by Step
Start outside. A clean exterior sets the stage, and you won’t track dirt inside while you work on the interior.
Step 1: Wash and Dry Thoroughly
Before any detailing, your car needs to be genuinely clean. Follow the two-bucket wash method from the previous guide. Rinse, wash from top to bottom, rinse again, and dry completely.
Why this matters: Detailing products like clay, polish, and wax need a clean surface to work. If you apply them over dirt, you’ll grind that dirt into the paint.
Step 2: Decontaminate with Clay
This is the step that most people skip — and it’s the one that makes the biggest difference.
What clay does: Your paint has invisible contamination stuck to it. Brake dust, industrial fallout, tree sap, and hard water minerals. Washing doesn’t remove these. Clay does.
How to clay:
- Spray clay lubricant (or quick detailer) onto a 2×2 foot section of paint.
- Flatten the clay bar into a small patty.
- Gently glide the clay across the lubricated paint. Use light pressure.
- You’ll feel the clay grab at first. As contamination lifts, it becomes smooth.
- Wipe away residue with a microfiber towel.
- Fold the clay to a clean side every few passes.
What you’ll feel: At first, the clay drags or feels bumpy. After a few passes, it glides smoothly. That’s the contamination coming off.
Safety reminder: If you drop your clay bar on the ground, throw it away. It will pick up grit that will scratch your paint. Use a fresh piece.
Tip: A clay mitt is faster and easier than a clay bar, especially for beginners. It works the same way but fits over your hand like a wash mitt.
Step 3: Polish or Glaze (If Needed)
Polishing removes fine scratches, swirl marks, and light oxidation. It restores clarity and depth to your paint.
Do you need to polish? Look at your paint in direct sunlight. Do you see spiderweb scratches? Does the paint look hazy or dull? If yes, polish. If your paint looks good already, skip to wax.
How to polish by hand:
- Apply a small amount of polish to a foam applicator pad.
- Work on one small section at a time (about 2×2 feet).
- Rub the polish into the paint using circular motions with light pressure.
- Let it haze over (follow product instructions, usually 1–2 minutes).
- Buff off with a clean microfiber towel.
What to expect: Hand polishing won’t remove deep scratches. But it will remove light swirl marks and add noticeable gloss. For deep scratches, you need a machine polisher.
Interesting fact: A light glaze (sometimes called a “show glaze”) doesn’t remove scratches — it fills them in temporarily. It’s great for making an older car look amazing for a car show or resale.
Step 4: Apply Wax or Sealant
Wax protects your paint from UV rays, bird droppings, and road grime. It also makes water bead up and roll off. This is the final step that locks in all your hard work.
Types of protection:
- Spray wax — easiest, lasts 2–4 weeks
- Liquid wax — moderate effort, lasts 2–3 months
- Paste wax — most effort, lasts 3–4 months
- Ceramic spray — easy, lasts 4–6 months
- True ceramic coating — difficult, lasts 2–5 years (not for beginners)
How to apply spray wax (easiest for home detailers):
- Spray a light mist onto one panel at a time.
- Spread with a microfiber towel.
- Flip to a dry section of the towel and buff to a shine.
How to apply liquid or paste wax:
- Apply a thin layer to a foam applicator pad.
- Spread evenly over a panel using circular motions.
- Let it haze (follow product instructions, usually 5–10 minutes).
- Buff off with a clean microfiber towel.
Safety reminder: Never apply wax in direct sunlight. The panel will be too hot, and the wax will dry instantly, becoming impossible to remove.
Do you currently use any protection on your paint? If not, even a simple spray wax will make a huge difference.
Part 2: Interior Detailing Step by Step
Now for the inside. Work from top to bottom here too — start with the ceiling and work down to the floors.
Step 1: Remove Everything
Take out floor mats, trash, loose change, phone cables, and anything else that doesn’t belong. Pull out the spare change cup. Empty the glove box if you’re going to clean inside it.
Why this matters: You can’t clean what you can’t reach. And cleaning around clutter takes twice as long.
Step 2: Vacuum Thoroughly
Use a vacuum with attachments. A handheld vacuum or a small shop vac works perfectly for car interiors.
Vacuuming order:
- Headliner (ceiling) — use a soft brush attachment
- Seats — crevice tool for seams
- Floor and carpets — wide attachment
- Cargo area
- Floor mats — vacuum both sides, then set aside
Don’t forget: Under the seats, between the seats and center console, and inside the seatback pockets.
Interesting fact: The average car interior has more bacteria per square inch than a kitchen counter. Vacuuming removes the food crumbs that bacteria feed on.
Step 3: Clean Hard Surfaces
Use your interior cleaner or all-purpose cleaner diluted properly. Spray onto a microfiber towel, never directly onto the surface.
What to clean:
- Dashboard
- Door panels and armrests
- Center console
- Steering wheel and gear shift
- Climate control knobs and buttons
- Cup holders (use a brush for corners)
- Sun visors
Technique: Spray the towel, wipe the surface, then use a dry section of the towel to buff. For vents and tight spaces, wrap the towel around a detailing brush.
Safety reminder: Never spray cleaner directly onto your touchscreen or gauge cluster. Liquid can seep into the edges and ruin the electronics. Spray the towel first, then wipe.
Step 4: Clean Fabric Seats and Carpets
If you have cloth seats, they hold onto spills, sweat, and odors. A fabric cleaner and a stiff brush will lift most stains.
How to clean fabric:
- Vacuum the seat thoroughly first.
- Spray fabric cleaner onto the seat (or onto a towel for sensitive fabrics).
- Agitate with a soft brush.
- Blot with a clean, dry microfiber towel.
- Let air dry with windows open.
For leather seats:
- Wipe with a damp microfiber to remove surface dirt.
- Apply leather cleaner with a foam applicator.
- Wipe away cleaner with a clean towel.
- Apply leather conditioner to keep the leather soft and prevent cracking.
Interesting fact: Leather conditioner isn’t just for looks. It replaces oils that leather loses over time, preventing cracking and extending the life of your seats by years.
Step 5: Clean Glass Inside
Interior windows get a greasy film from plastic dashboard off-gassing and human skin oils. Regular glass cleaner works, but you need a good technique.
How to clean interior glass:
- Spray glass cleaner onto a microfiber towel (not the glass).
- Wipe the window in one direction (horizontal on front windows, vertical on rear).
- Use a second dry microfiber to buff.
- If you see streaks, you used too much product. Less is more.
Pro tip: Roll down the window slightly to clean the very top edge. That edge collects grime that reappears when you roll the window up.
Step 6: Finish with Protection and Freshening
Optional but nice: apply a protectant to your dashboard and vinyl surfaces. This adds UV protection and keeps plastic from fading and cracking.
Odor elimination: Instead of covering smells with air freshener, remove the source. An odor eliminator spray (not just a fragrance) neutralizes bacteria. Or place an opened box of baking soda under a seat for 24 hours.
Do you know what’s hiding under your seats? The first time you detail a car you’ve owned for years, you might be shocked.
What’s in Your Kit vs. What You Need
Here’s a realistic look at what a basic cleaning kit can handle versus what you might need to add.
| Task | Basic Kit | Kit + Detailing Add-ons |
|---|---|---|
| Wash and dry | Yes | Yes |
| Decontamination (clay) | No | Yes (add clay bar) |
| Polish or glaze | No | Yes (add polish) |
| Wax or sealant | Spray wax only | Paste or liquid wax |
| Interior vacuum | Yes (if you have a vacuum) | Yes |
| Hard surface cleaning | Yes (with all-purpose cleaner) | Yes |
| Fabric seat cleaning | No | Yes (add fabric cleaner) |
| Leather treatment | No | Yes (add leather products) |
| Glass cleaning | Yes | Yes |
Tip: You don’t need to buy everything at once. Start with a clay bar and a spray wax. Next month, add a polish. The month after, add interior fabric cleaner. Build your kit over time.
Comparison Table: Detailing Products That Fit in a Basic Kit
Real data from Amazon, Walmart, AutoZone, and Target as of April 2025.
| Product | Type | Best For | Price Range | Key Feature |
|---|---|---|---|---|
| Meguiar’s Smooth Surface Clay Kit | Clay bar | Paint decontamination | $15–20 | Includes lubricant and towel |
| Chemical Guys Clay Mitt | Clay mitt | Faster claying | $18–25 | Reusable, easier than bar |
| Meguiar’s Ultimate Polish | Light polish | Swirl removal | $10–15 | Works by hand or machine |
| Turtle Wax Hybrid Spray Wax | Ceramic spray wax | Easy protection | $12–18 | Lasts 4–6 months |
| Chemical Guys Total Interior Kit | Interior cleaner | All surfaces | $30–45 | Cleaner and protectant in one |
| Armor All Complete Car Care Kit | All-in-one | Beginners | $25–35 | Everything to start detailing |
| Invisible Glass Cleaner | Glass cleaner | Streak-free windows | $5–8 | Ammonia-free safe for tint |
The 2-Hour Home Detailing Routine (Cheat Sheet)
Here’s your complete schedule. Print it and check off steps as you go.
Exterior (60 minutes)
- [ ] Wash and dry car (30 min)
- [ ] Clay bar treatment (15 min)
- [ ] Apply polish if needed (10 min)
- [ ] Apply wax or sealant (10 min)
Interior (60 minutes)
- [ ] Remove all items and floor mats (5 min)
- [ ] Vacuum thoroughly (15 min)
- [ ] Clean hard surfaces (10 min)
- [ ] Clean fabric or leather seats (15 min)
- [ ] Clean interior glass (10 min)
- [ ] Apply protectant and odor eliminator (5 min)
Total: 2 hours for a small to medium car. Add 30–60 minutes for an SUV or truck.
Interesting fact: A full home detail costs about $30–50 in products (spread over multiple uses). A professional detail costs $150–300. After two details, your kit pays for itself.
Common Detailing Mistakes and How to Fix Them
Mistake #1: Skipping the Clay Bar
Your paint feels smooth after washing, so you think it’s clean. But run your fingers over it inside a plastic bag — the bag amplifies the bumps. Those bumps are contamination.
Fix: Do the “plastic bag test.” Put your hand inside a sandwich bag and gently run your fingers over clean paint. If you feel bumps, you need clay.
Mistake #2: Using Too Much Product
More polish doesn’t mean more shine. More wax doesn’t mean more protection. Excess product is hard to remove and leaves residue.
Fix: Use a thin, even layer. You should barely see the product on the surface. Thin layers work better than thick ones.
Mistake #3: Cross-Contaminating Towels
That towel you used to wipe off polish now has abrasive compound in it. Using it on your glass will leave micro-scratches.
Fix: Keep towels separated by job. Paint towels. Glass towels. Interior towels. Wheel towels. Label them or color-code them.
Mistake #4: Detailing in the Sun
Direct sunlight makes products dry too fast. Polish becomes powder. Wax becomes glue. Everything is harder to remove.
Fix: Detail early morning, late evening, or in a garage. If you have no shade, work one panel at a time and keep the rest of the car wet.
Have you ever spent an hour applying wax only to struggle for another hour trying to remove it? That’s sun damage.
FAQ: Detailing Your Car at Home with a Kit
What’s the difference between a cleaning kit and a detailing kit?
A cleaning kit focuses on washing. A detailing kit adds clay, polish, and wax for deeper cleaning and protection.
How often should I detail my car at home?
Every 3–6 months for a daily driver. Every 6–12 months if the car is garage-kept and rarely driven.
Can I detail my car with just a basic cleaning kit?
You can do a “light detail” — wash, spray wax, interior vacuum and wipe. For full detailing, add a clay bar and polish.
What tools are needed for home detailing beyond a kit?
A vacuum with attachments, a set of detailing brushes, and foam applicator pads. That’s about $20–30 extra.
Is a clay bar safe for beginners?
Yes, as long as you use plenty of lubricant and light pressure. A clay mitt is even more beginner-friendly.
How do I know if my paint needs polishing?
Look at it in direct sunlight. If you see spiderweb scratches or a hazy reflection, polishing will help.
Can I detail my car in an apartment parking lot?
Yes for interior detailing. For exterior, use rinseless wash products and work in a shaded spot. Skip the hose if you don’t have one.
The Bottom Line: Detailing Is Just Washing with Extra Steps
You already know how to wash your car. Detailing just adds three things: clay to remove bonded dirt, polish to restore shine, and wax to lock in protection. Inside, it adds thorough vacuuming and surface cleaning.
You don’t need a garage full of tools. You don’t need years of experience. You need a decent cleaning kit, a few add-ons, and two to three hours of focused time.
Start with a clay bar and a spray wax. That alone will make your car look and feel dramatically better. Add polish next time. Add interior fabric cleaner the time after that. Build your skills and your kit slowly.
The first time you run your hand over a freshly clayed and waxed hood, you’ll understand. That smoothness. That deep reflection. That’s the feeling of a job done right. And you did it yourself, in your own driveway, with tools that fit in a bucket.
Interesting fact: A professionally detailed car can sell for $500–2,000 more than the same car with neglected paint and interior. A $50 home detailing kit can pay for itself many times over at resale time.
What’s your go-to cleaning method or tool? Share your experience in the comments below.
References: